Uploading Your First Assets
Uploading your digital assets to BrandLife is a straightforward process that allows you to organize and manage your content efficiently. This in-depth guide will walk you through the steps to upload various types of assets, including direct transfers from Google Drive and Dropbox, provide tips for effective organization, and highlight best practices to ensure a smooth upload experience.
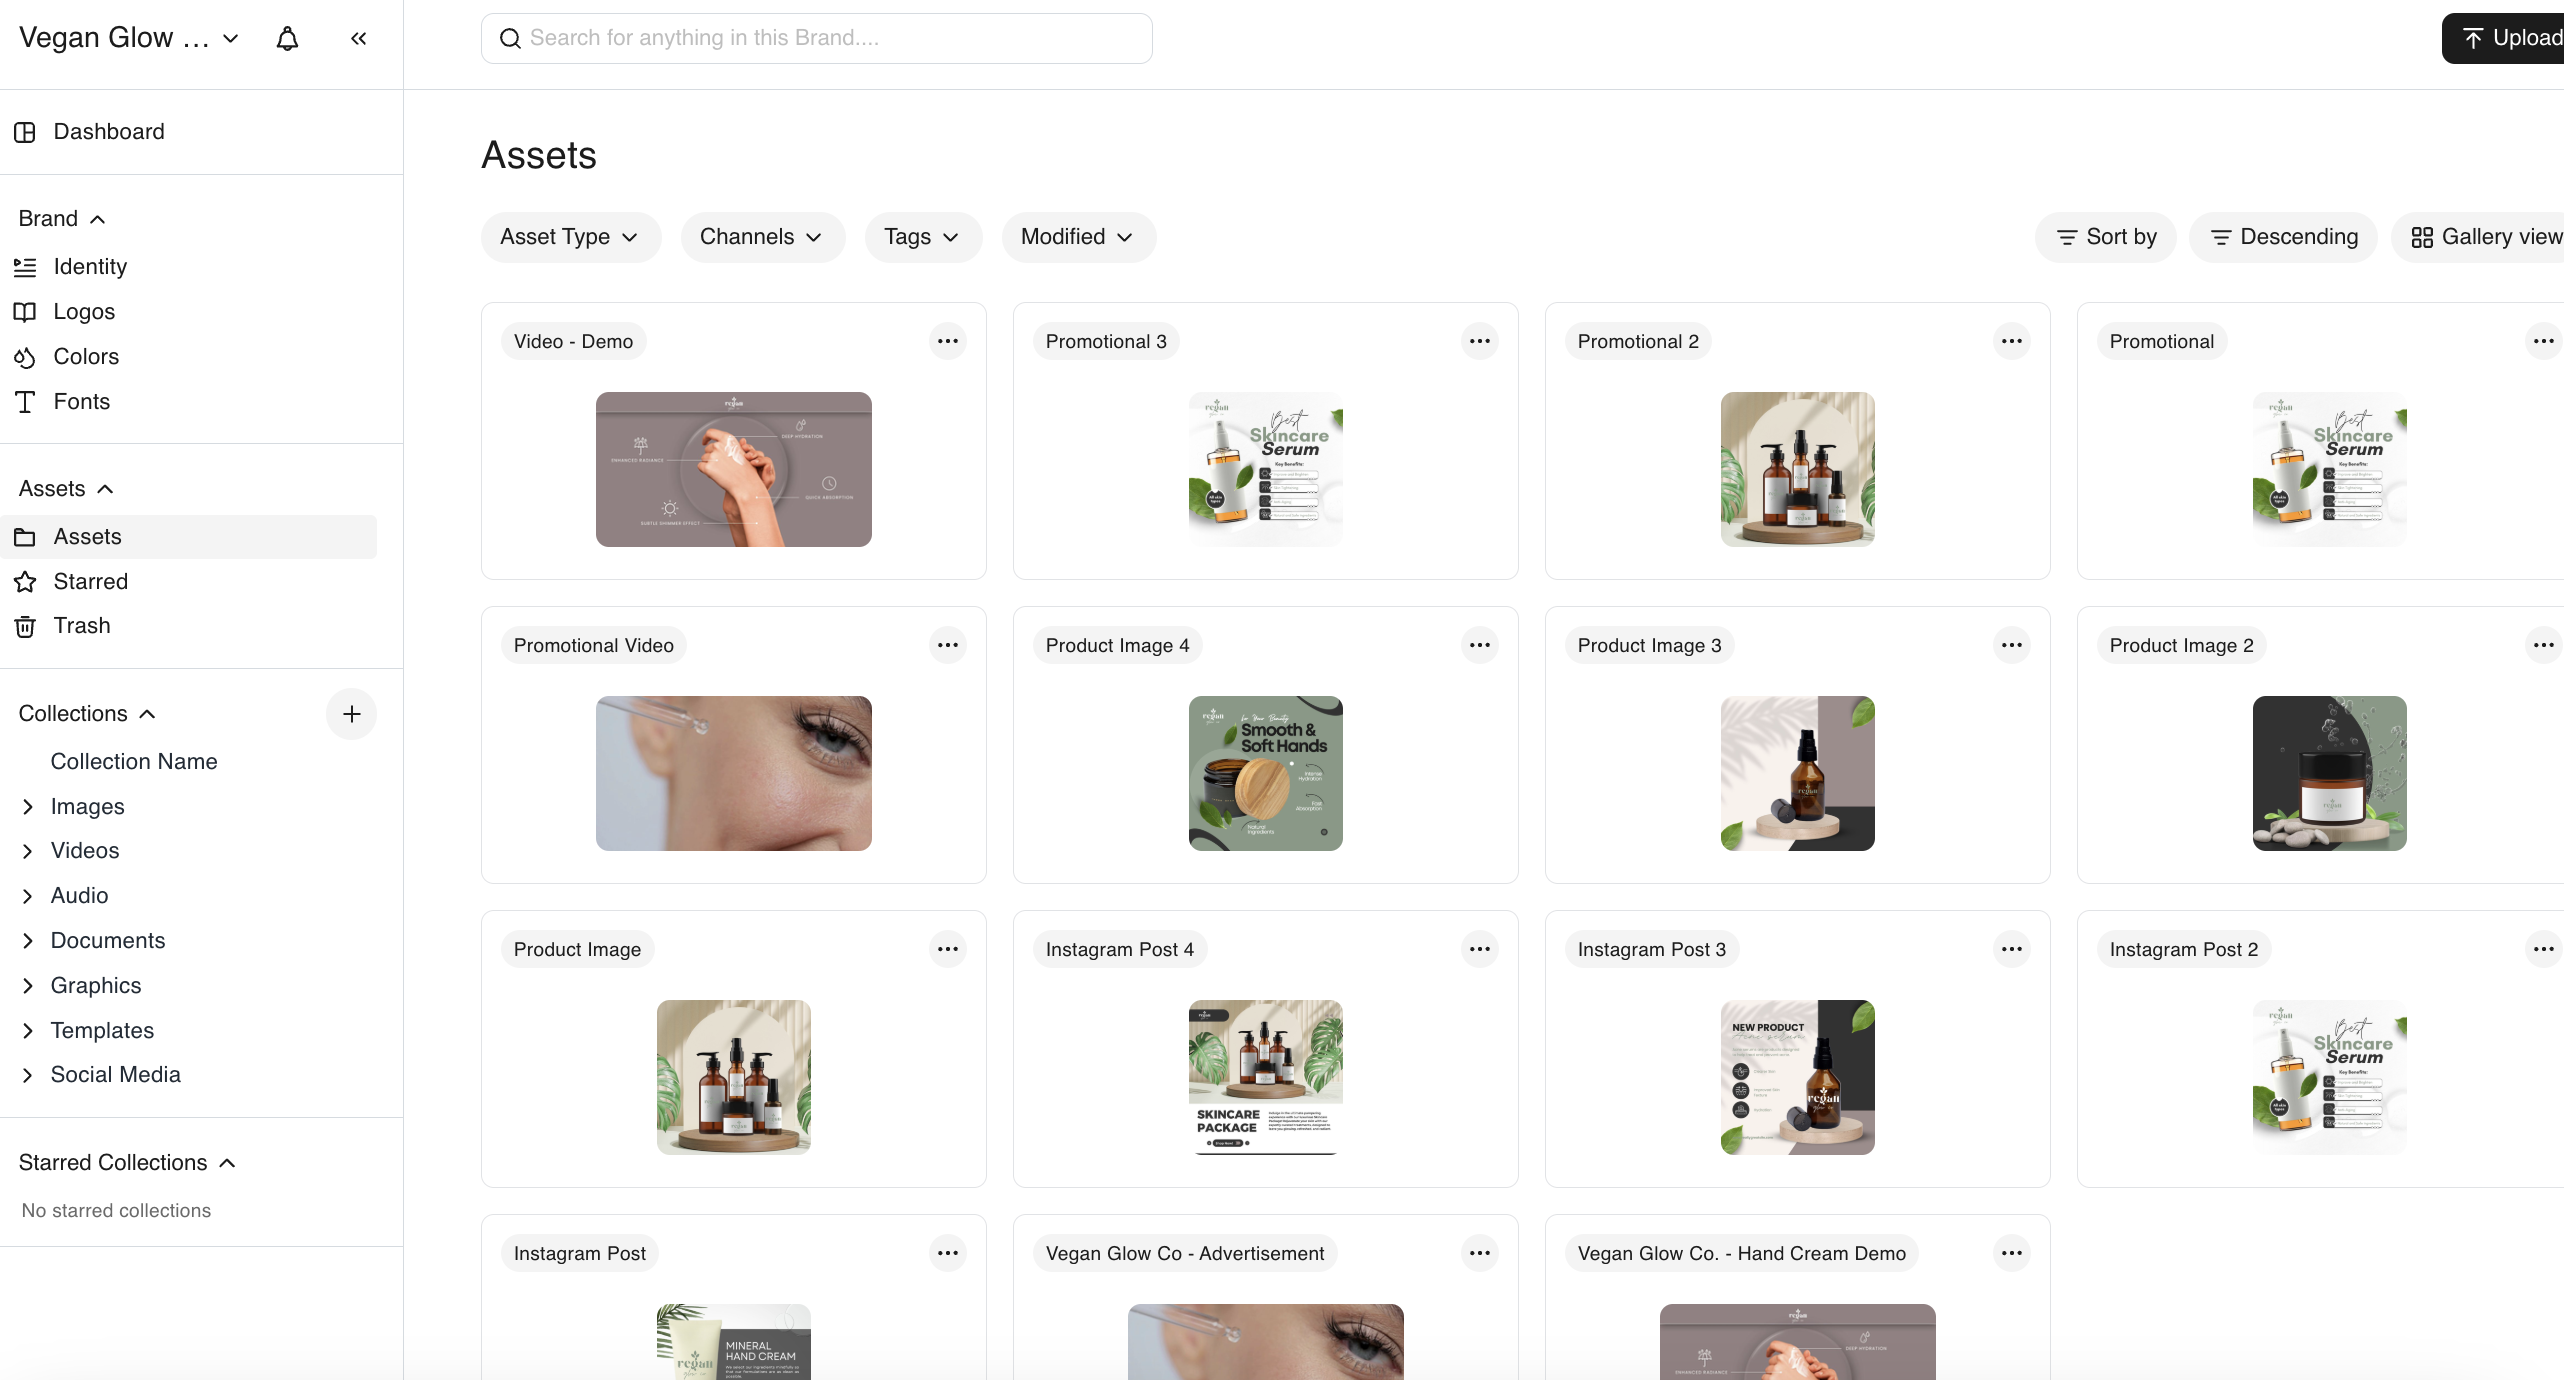
Step 1: Accessing the Upload Section
- Navigate to the BrandLife dashboard after logging in.
- Click on the “Uploads” option in the sidebar menu. This will take you to the upload interface, where you can manage your asset uploads.
Step 2: Preparing Your Assets for Upload
Before uploading, ensure your assets are ready:
- File Size: Check that your files do not exceed the maximum upload size limit set by BrandLife. If necessary, compress larger files before uploading.
- Naming Conventions: Use descriptive and consistent naming conventions for your files. This will make it easier to identify and search for assets later.
Step 3: Uploading Your Assets
You have two options for uploading assets: directly from your device or via cloud storage services like Google Drive and Dropbox.
Direct Upload from Your Device:
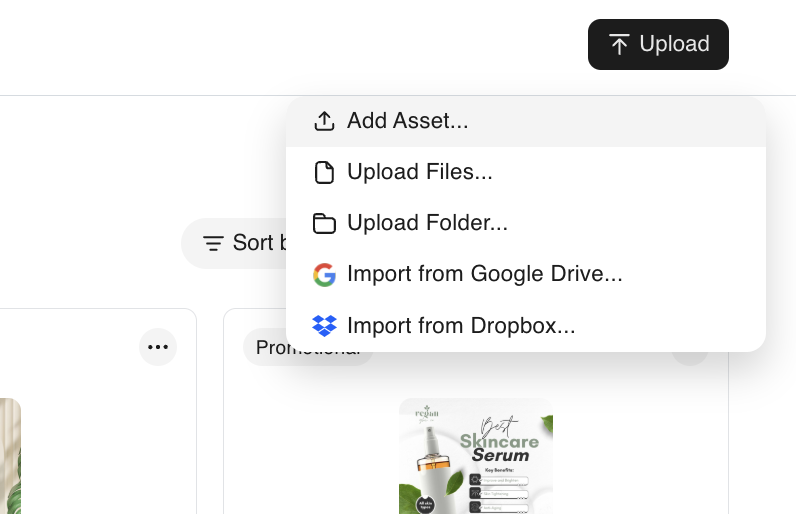
- In the Uploads section, click on the “Upload” button, typically located at the top right corner of the page.
- A file dialog will open, allowing you to select files from your device. You can also drag and drop files directly into the upload area if supported.
- Select the files you want to upload and click “Open” or “Upload” to begin the process.
Direct Transfer from Google Drive or Dropbox:
- If you prefer to upload directly from cloud storage, look for the “Import from Google Drive” or “Import from Dropbox” options in the upload section on the top right.
- Click on the desired service, and you will be prompted to log in to your Google Drive or Dropbox account if you aren’t already authenticated.
- Once logged in, you can browse your cloud storage and select the files you want to upload. Click “Import” or “Select” to transfer the files directly into BrandLife.
Step 4: Organizing Your Assets
- Once the upload is complete, you may have the option to organize your files into folders or collections. Consider the following:
- Folders: Create folders based on categories, projects, or asset types to keep your library organized.
- Collections: Use collections to group related assets together, making them easily accessible for specific campaigns or initiatives.
Step 5: Reviewing and Finalizing Uploads
- After organizing, review your uploaded assets in the Asset Library. Check that all metadata, tags, and descriptions are accurate.
- Make any necessary adjustments by editing the asset details, which can typically be done by clicking on the asset and selecting the edit option.
Step 6: Utilizing AI-Powered Tagging (Optional)
- If BrandLife offers AI-Powered Tagging, consider enabling this feature. The AI will analyze your uploaded assets and generate tags automatically, saving you time and enhancing searchability.
Tips for Successful Uploads:
- Batch Uploading: If you have multiple assets to upload, consider using the batch upload feature (if available) to save time.
- Regular Maintenance: Periodically review and update your asset library to remove outdated files and refine tags to keep your library relevant and accessible.
- Use Version Control: If you need to update an asset, upload the new version and keep track of its history to avoid confusion.
Uploading your first assets to BrandLife is the gateway to effective digital asset management. By following the steps outlined in this guide, you can ensure a smooth upload process, whether from your device or through direct transfers from Google Drive or Dropbox. This will create a well-organized library that supports your branding and marketing efforts.
If you encounter any issues or need further assistance during the upload process, don't hesitate to consult our Help Center or contact our support team for guidance. Happy uploading!